Documentation
After finalization of model getting documentation.
To fill in the Title block on the drawings automatically, fill the Project Information:
- On the Primary panel click
 Manage styles –
  Project information.
 - Complete the required fields for the documentation: Project name and Legal Owner property.
In the beginning, we need to create a new drawing in the project:
- Open the Project Explorer. Click Create new drawing.
- Set the drawing name - 01-Floor Plan.
- Open the drawing.
- Specify page parameters:

Page format.
A3

Page orientation.
Album

Layout style.
Compact form
- The project name will automatically display in the title block. To add a drawing name, enter the text {Name} in the cell.
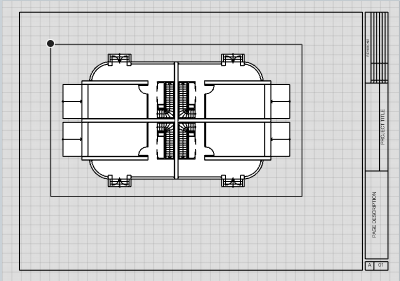
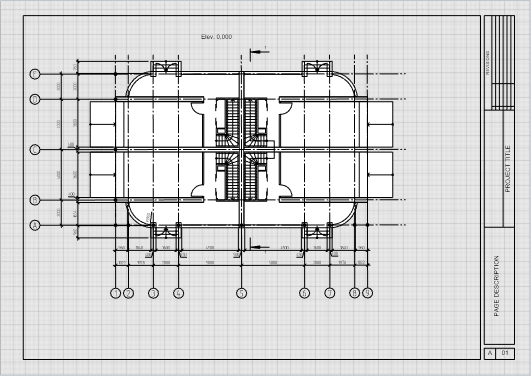
We'll proceed to executing the 01-Floor plan. First of all, a view shall be inserted. It is necessary to insert a view so that the beams do not appear in the drawing.
- Click the View
 tool. There is no an appropriate style on the list, create a new one.
 - There is no suitable style in the list, edit an existing one. In the Display style
 parameter, select Other.
 - Select the Floor plan style in the appeared window.
- In the right part of window, remove the check mark in the Visibility column for Beams.
- Click OK.
- Specify view settings:
- Select the insertion point in the sheet.
|
|
View. |
Base Level |

|
View scale. |
1:100 |

|
Display style. |
Floor Plan |

|
View depth plane offset. |
-100 |
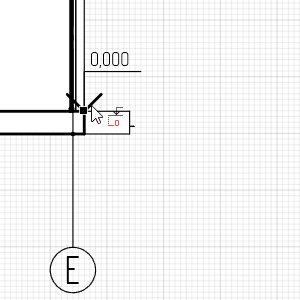
Now let us create a drawing header:
- Select the
 Text tool .
 - Define the text insertion area by two points.
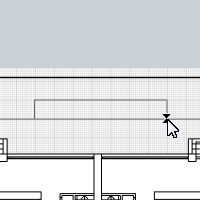
- In the Text Editor, select the font and set its height to 4.5 mm.
- Enter text Elev. 0,000. And click OK.
- Then press Esc to reset the tool.
- If the text does not fit into the frame going beyond it, select the frame and use handles to edit it.
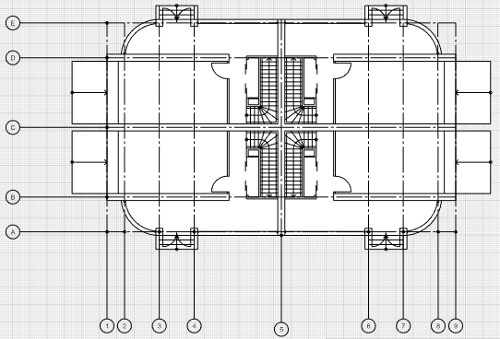
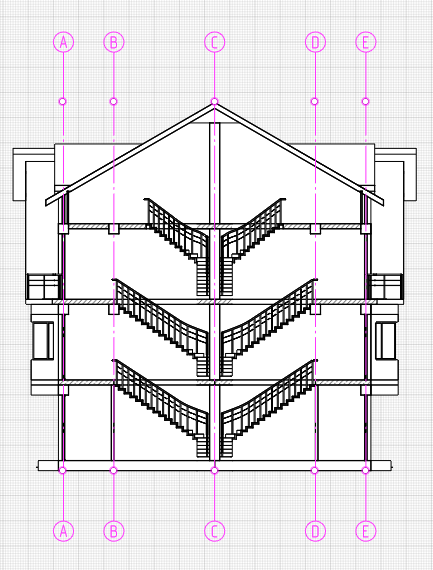
Now let us arrange grid lines:
- Select the Designation tool
 . The symbol type is Grid Line
  .
. - Select the Automatically by view
 section type.
 - Set grid line parameters:
- Move the mouse cursor to the inserted view. When the axes appear, left-click to fix the axes position.
- Change the construction mode to Line by specifying two points
 because not all grid lines are in the model.
 - Change grid line name to 3 in the parameters.
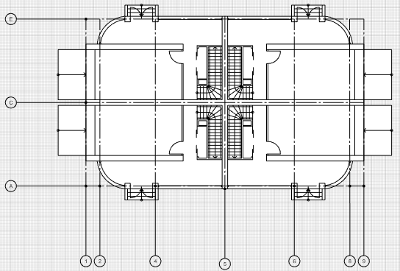
- Use the snap to the faces of column to define the first point of a grid line.
- Then select the grid line length to 120 mm and the grid line rotate angle in relation to Ox to 90° in the dynamic input fields.
- Fix the grid line position by left-clicking the mouse.
- Press Esc.
- To create the symmetrical 7 grid line, you can use the Mirror command.

- Next, select the alphabetical grid lines.
- Edit grid line extension to 60 mm in the parameters.
- Then create the other alphabetical grid lines.

|
Grid line extension. |
50 |

|
Grid bubbles display. |
First |

|
Text style |
Designation |
Now let's plot the dimensions.
- Select the Dimension
 tool. The dimension type is Linear Dimension
  .
. - In the properties, select Text Style - Dimension. Leave the other settings at their default values.
- Let's specify the dimension from the building edge to the arc wall. Estimate the dimension by two points.
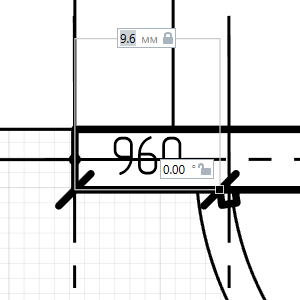
- Then move the pointer lower. Call the tracking snap to the staircase railings - the most prominent element.
- Fix the dimension position by left-clicking the mouse.
- With the Dimension tool active, predefine dimension of arc wall.
- Make it horizontal using the snap to the first dimension.
- Create rest of dimensions similarly.
- Press Esc to finish the dimension construction.
- And further plot the dimensions between the coordinate grid lines.
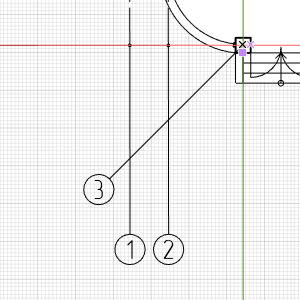
Let us plot the radiuses of the arc walls:
- Select the Dimension tool. The dimension type is Radial Dimension
 .
. - Move the mouse cursor to the arc wall.
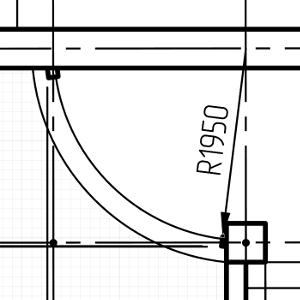
- Left-click to fix the dimension. Then set the dimension line size in the dynamic input field to 10 mm and left-click.
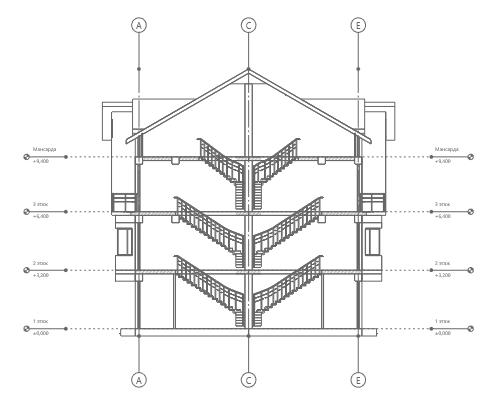
We have viewed all the basic tools for plan execution. Now let's proceed to section execution.
In order to make a section, you have to obtain its View first.
- Open the 01-Floor Plan in the Project Explorer.
- Select the Designation tool . Section
 symbol type.
 - Select the Section in parallel planes
 section type.
 - Section Parameters:
- Then construct a section in parallel planes:
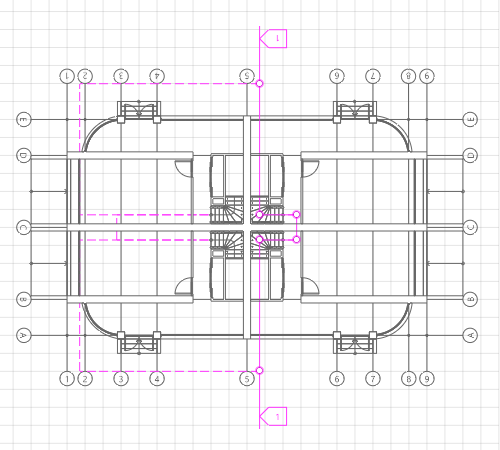
- Define the first symbol point using snaps so that the staircase is in the section plane.

- Define the next point at the staircase turn.
- Switch the measure mode to Rectangular in the context menu.
- Then enter the step length of 2000 mm and the length of the next symbol of the cutting plane (1400 mm) in the dynamic input field. Fix the position by clicking the mouse.
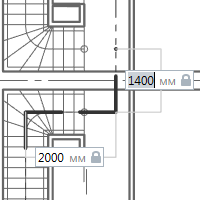
- The next step is symmetrical with the first one. The step length is 2000 mm and the plane designation length is 7300 mm. Fix the designation position by clicking the mouse.
- Press Enter to finish the construction.
- Right-click on the symbol and select the Open command.

|
Section name. |
1 |
|
|
Section line extension. |
3000 |
|
|
View depth plane offset. |
10000 |
Create a new drawing in the Project Explorer - Section in grid lines A-E. Open it and prepare a title block as described above.
Insert the section view in the drawing. View parameters:
|
|
View. |
1 |
|
|
View scale. |
1:100 |
|
|
Display style. |
Elevation View |
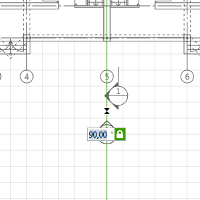
To place the grid lines, do the following:
- Select the Designation tool . The designation type is Grid Line .
- Select the Automatically by view section type.
- Set grid line parameters:
- Move the mouse cursor to the inserted section. When the axes appear, left-click to fix the axes position.
- If not all grid lines are in the model, create B and D grid lines by copying and using tracking snaps to 20 mm.
|
|
Grid line extension. |
20 |
|
|
Grid bubbles display. |
First |
|
|
Text style |
Designation |
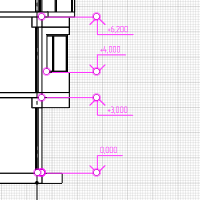
Now let us put the elevation marks.
- Select the Dimension tool. The dimension type is Elevation mark
 .
. - In the properties, select Text Style - Dimension.
- Select the zero height point at the floor level.
- As it is necessary that a zero mark be plotted in the drawing, specify the next point at the same height.
- Fix the elevation mark position in the drawing by left-clicking the mouse.

- Without suspending the command operation, specify the floor point of the second floor.
- Specify the elevation marks of the floors and window openings similarly.
Just as for a section, an slope arrangement requires obtaining its View first.
- Open the Basic Level in the Project Explorer.
- Select the Designation tool. The designation type is Elevation
 .
. - Select the designation location point and select direction at 90°.
- Left-click to fix the elevation position.
- Create one more elevation, for a side view.
- Open the elevations views in the Project Explorer.
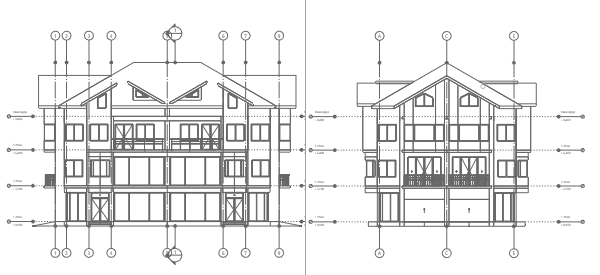
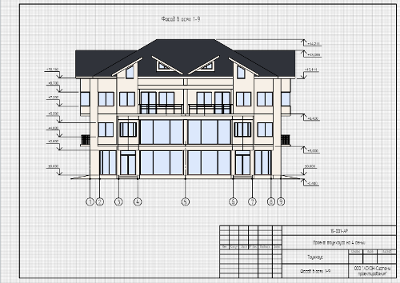
Get an elevation drawing:
- Select the View tool. Set Parameters:
View.
Elevation 1
View scale.
1:100

Visual style.
Color
Display style.
Elevation View
- Finalize the elevation by using the knowledge you acquired earlier.