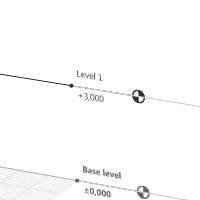
Level
The Level  designation allows you to create horizontal planes in 3D View for constructing objects at different elevations, and get level views for preview and editing.

|
The Level tool is only available for work in a 3D View. |
Creating level
In order to create a new level, do the following:
- In the tools, select Designation
 - the Level tool.
 - In the Parameters panel, specify

Level name. 
Section plane offset. It determines the elevation mark of section plane in relation to the current level.

View depth level. It determines the level at which the depth of view plane is located.

View depth plane offset. It determines the elevation mark of section plane in relation to the view depth level. The view will not display objects that are completely outside the view depth plane.

Object part beyond view depth plane. It determines whether to show or hide parts of objects that are partially outside the view depth plane.

- Move the pointer to the necessary distance from the previous level or type the value in the dynamic input field.
- Left-click to fix the level position. Keep making levels if needed.
- Press Esc to finish level building.
The location of the section plane and the view depth plane, set by the level parameters, determine the visibility area where objects are displayed in the level view. If the section plane intersects an object, its section is displayed on the view. If the section plane does not intersect an object that is in the visibility area, then its projection is displayed on the view.
The parameters may be modified both in the construction and editing process.
In order to change the level's elevation mark, do the following:
- Select a level, left-click the level's handle.
- Specify a new level position in the dynamic input field
- Left-click to fix the level position.
In order to copy a created level, select it by using the Select  tool and use Handles:
- Select a level.
- Holding Ctrl click a handle.
- Move the pointer to the necessary distance from the previous level or type the value in the dynamic input field.
- Left-click to fix the level position.
|
|
Levels can be overlapped on one another. |
Features of Work on 3D View Tab
All the objects are constructed on the current level by default. To change a level, double click the level image or the level line on the 3D View or select the Place Work Plane option on the level's shortcut menu.
The Level parameter of any object allows to place an object on any existing level. As well as move the object from level to level during the editing.
All the objects located on the level are deleted, copied, moved and hidden along with the level. In addition, when you apply a Visual style to a level, the visual style will be applied to all the objects on the level.
Preview and editing level's view
To open the level for viewing and editing, do the following:
- Click Open Project Explorer
 .
. - Left-click a level's thumbnail.
or
- Right-click a level image or it's line on the 3D view.
- Select the Open option on the shortcut menu.
- Edit the objects which projections and sections are displayed on the level view.
Objects on level views are displayed as projections or sections, depending on the section plane location . To display all objects in the level view as thin lines, disable the Display true line thickness option in Settings.
The principles of work with tools are the same on both 3D and 2D views, but the Cubic, Cylindrical and Spherical measure modes work only in 3D View. If one of these measure modes is required to build an object, go to 3D View.
To make your work with level plans convenient, specify the level's plan parameters
- On the Tools panel, click the Select tool.
- On the Parameters panel, specify the following parameters:
|
|
Section plane offset. |
|
|
View depth level. |
|
|
View depth plane offset. |
|
|
Object part beyond view depth plane. |
|
|